Run an Experiment on OpenpaiYarn
The original pai mode is modificated to paiYarn mode, which is a distributed training platform based on Yarn.
Run an experiment
Use examples/trials/mnist-tfv1 as an example. The NNI config YAML file’s content is like:
authorName: your_name
experimentName: auto_mnist
# how many trials could be concurrently running
trialConcurrency: 2
# maximum experiment running duration
maxExecDuration: 3h
# empty means never stop
maxTrialNum: 100
# choice: local, remote, pai, paiYarn
trainingServicePlatform: paiYarn
# search space file
searchSpacePath: search_space.json
# choice: true, false
useAnnotation: false
tuner:
  builtinTunerName: TPE
  classArgs:
    optimize_mode: maximize
trial:
  command: python3 mnist.py
  codeDir: ~/nni/examples/trials/mnist-tfv1
  gpuNum: 0
  cpuNum: 1
  memoryMB: 8196
  image: msranni/nni:latest
# Configuration to access OpenpaiYarn Cluster
paiYarnConfig:
  userName: your_paiYarn_nni_user
  passWord: your_paiYarn_password
  host: 10.1.1.1
Note: You should set trainingServicePlatform: paiYarn in NNI config YAML file if you want to start experiment in paiYarn mode.
Compared with LocalMode and RemoteMachineMode, trial configuration in paiYarn mode have these additional keys:
cpuNum
- Required key. Should be positive number based on your trial program’s CPU requirement
memoryMB
- Required key. Should be positive number based on your trial program’s memory requirement
image
- Required key. In paiYarn mode, your trial program will be scheduled by OpenpaiYarn to run in Docker container. This key is used to specify the Docker image used to create the container in which your trial will run.
- We already build a docker image nnimsra/nni on Docker Hub. It contains NNI python packages, Node modules and javascript artifact files required to start experiment, and all of NNI dependencies. The docker file used to build this image can be found at here. You can either use this image directly in your config file, or build your own image based on it.
virtualCluster
- Optional key. Set the virtualCluster of OpenpaiYarn. If omitted, the job will run on default virtual cluster.
shmMB
- Optional key. Set the shmMB configuration of OpenpaiYarn, it set the shared memory for one task in the task role.
authFile
- Optional key, Set the auth file path for private registry while using paiYarn mode, Refer, you can prepare the authFile and simply provide the local path of this file, NNI will upload this file to HDFS for you.
portList
- Optional key. Set the portList configuration of OpenpaiYarn, it specifies a list of port used in container, Refer.The config schema in NNI is shown below:
portList:
  - label: test
    beginAt: 8080
    portNumber: 2
Let’s say you want to launch a tensorboard in the mnist example using the port. So the first step is to write a wrapper script
launch_paiYarn.shofmnist.py.export TENSORBOARD_PORT=paiYarn_PORT_LIST_${paiYarn_CURRENT_TASK_ROLE_NAME}_0_tensorboard tensorboard --logdir . --port ${!TENSORBOARD_PORT} & python3 mnist.py
The config file of portList should be filled as following:
trial:
command: bash launch_paiYarn.sh
portList:
  - label: tensorboard
    beginAt: 0
    portNumber: 1
NNI support two kind of authorization method in paiYarn, including password and paiYarn token, refer. The authorization is configured in paiYarnConfig field.For password authorization, the paiYarnConfig schema is:
paiYarnConfig:
  userName: your_paiYarn_nni_user
  passWord: your_paiYarn_password
  host: 10.1.1.1
For paiYarn token authorization, the paiYarnConfig schema is:
paiYarnConfig:
  userName: your_paiYarn_nni_user
  token: your_paiYarn_token
  host: 10.1.1.1
Once complete to fill NNI experiment config file and save (for example, save as exp_paiYarn.yml), then run the following command
nnictl create --config exp_paiYarn.yml
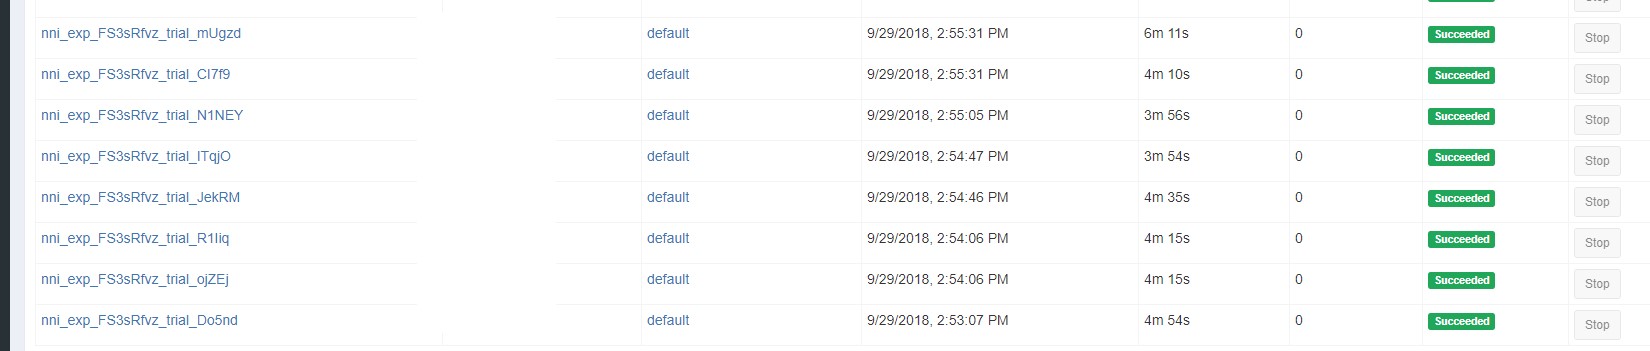
to start the experiment in paiYarn mode. NNI will create OpenpaiYarn job for each trial, and the job name format is something like nni_exp_{experiment_id}_trial_{trial_id}.
You can see jobs created by NNI in the OpenpaiYarn cluster’s web portal, like:
Notice: In paiYarn mode, NNIManager will start a rest server and listen on a port which is your NNI WebUI’s port plus 1. For example, if your WebUI port is 8080, the rest server will listen on 8081, to receive metrics from trial job running in Kubernetes. So you should enable 8081 TCP port in your firewall rule to allow incoming traffic.
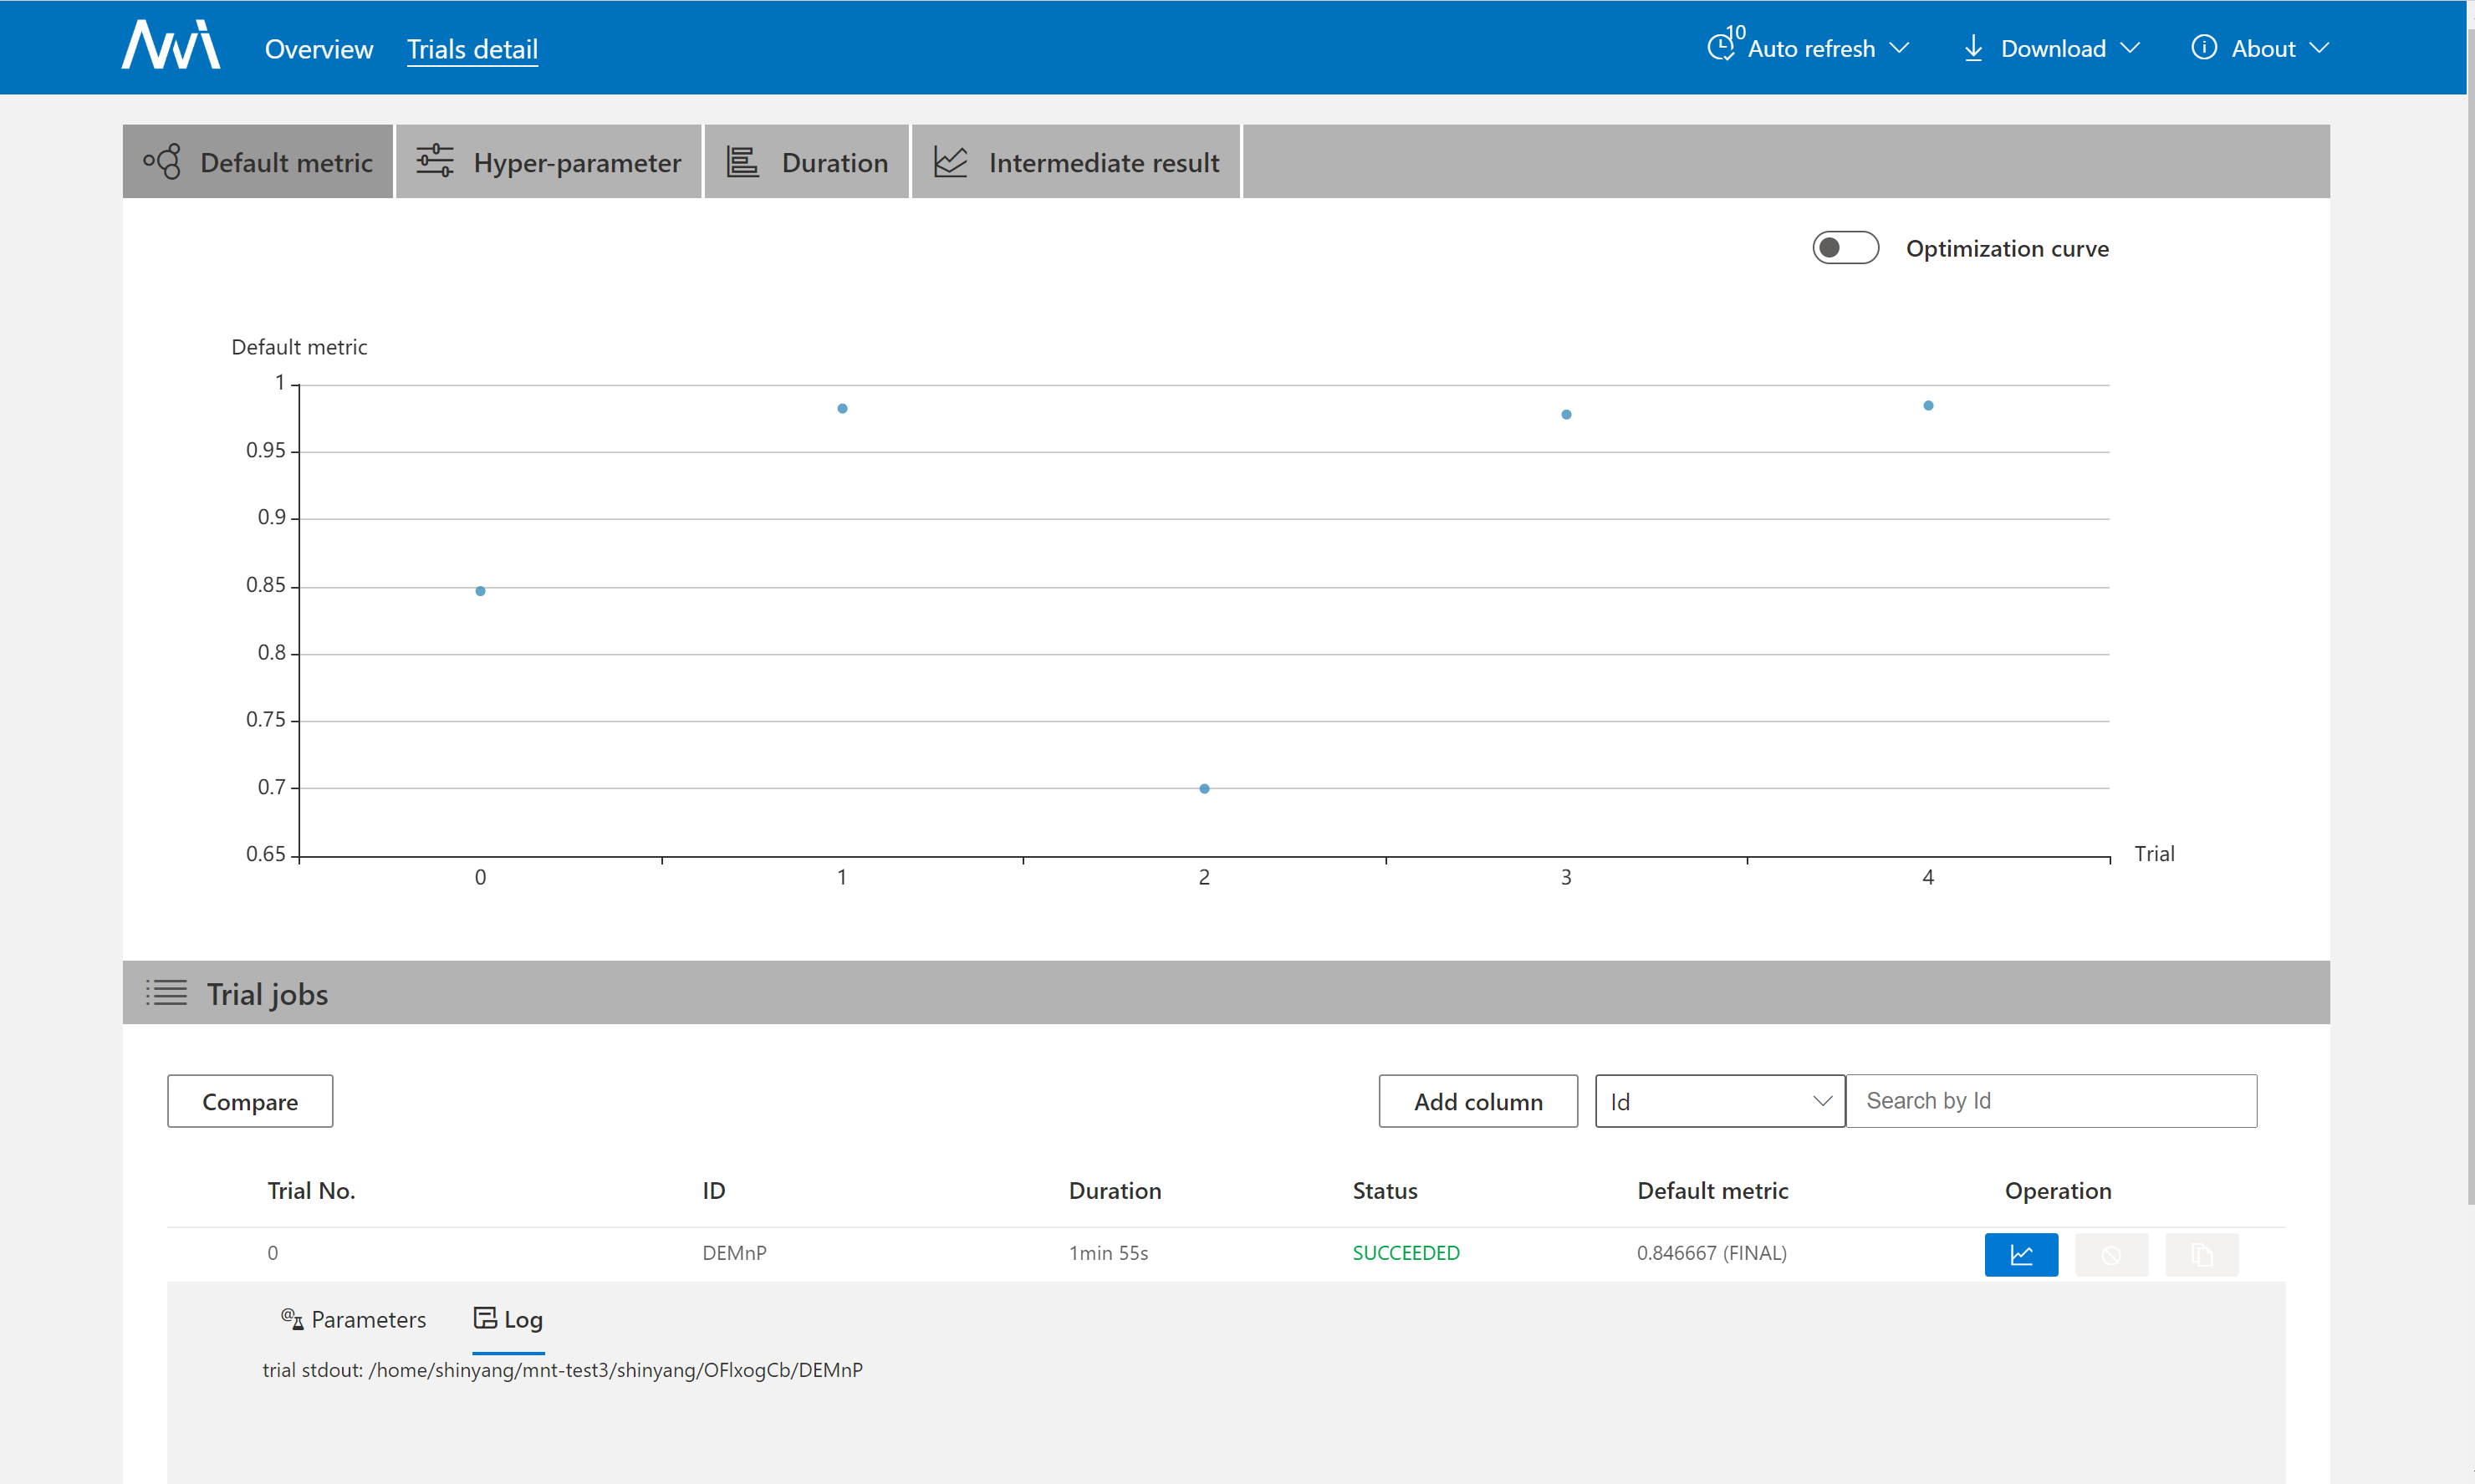
Once a trial job is completed, you can goto NNI WebUI’s overview page (like http://localhost:8080/oview) to check trial’s information.
Expand a trial information in trial list view, click the logPath link like:
And you will be redirected to HDFS web portal to browse the output files of that trial in HDFS:
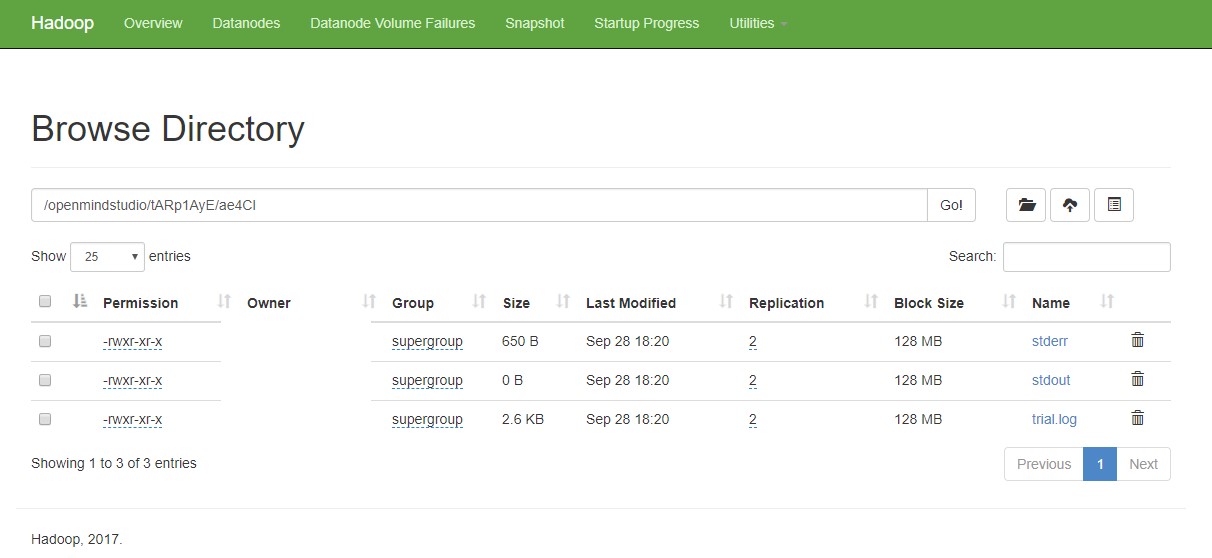
You can see there’re three fils in output folder: stderr, stdout, and trial.log
data management
If your training data is not too large, it could be put into codeDir, and nni will upload the data to hdfs, or you could build your own docker image with the data. If you have large dataset, it’s not appropriate to put the data in codeDir, and you could follow the guidance to mount the data folder in container.
If you also want to save trial’s other output into HDFS, like model files, you can use environment variable NNI_OUTPUT_DIR in your trial code to save your own output files, and NNI SDK will copy all the files in NNI_OUTPUT_DIR from trial’s container to HDFS, the target path is hdfs://host:port/{username}/nni/{experiments}/{experimentId}/trials/{trialId}/nnioutput
version check
NNI support version check feature in since version 0.6. It is a policy to insure the version of NNIManager is consistent with trialKeeper, and avoid errors caused by version incompatibility. Check policy:
- NNIManager before v0.6 could run any version of trialKeeper, trialKeeper support backward compatibility.
- Since version 0.6, NNIManager version should keep same with triakKeeper version. For example, if NNIManager version is 0.6, trialKeeper version should be 0.6 too.
- Note that the version check feature only check first two digits of version.For example, NNIManager v0.6.1 could use trialKeeper v0.6 or trialKeeper v0.6.2, but could not use trialKeeper v0.5.1 or trialKeeper v0.7.
If you could not run your experiment and want to know if it is caused by version check, you could check your webUI, and there will be an error message about version check.
