QuickStart
Installation
Currently, NNI supports running on Linux, macOS and Windows. Ubuntu 16.04 or higher, macOS 10.14.1, and Windows 10.1809 are tested and supported. Simply run the following pip install in an environment that has python >= 3.6.
Linux and macOS
python3 -m pip install --upgrade nni
Windows
python -m pip install --upgrade nni
Note
For Linux and macOS, --user can be added if you want to install NNI in your home directory, which does not require any special privileges.
Note
If there is an error like Segmentation fault, please refer to the FAQ.
Note
For the system requirements of NNI, please refer to Install NNI on Linux & Mac or Windows. If you want to use docker, refer to HowToUseDocker.
“Hello World” example on MNIST
NNI is a toolkit to help users run automated machine learning experiments. It can automatically do the cyclic process of getting hyperparameters, running trials, testing results, and tuning hyperparameters. Here, we’ll show how to use NNI to help you find the optimal hyperparameters on the MNIST dataset.
Here is an example script to train a CNN on the MNIST dataset without NNI:
def main(args):
    # load data
    train_loader = torch.utils.data.DataLoader(datasets.MNIST(...), batch_size=args['batch_size'], shuffle=True)
    test_loader = torch.tuils.data.DataLoader(datasets.MNIST(...), batch_size=1000, shuffle=True)
    # build model
    model = Net(hidden_size=args['hidden_size'])
    optimizer = optim.SGD(model.parameters(), lr=args['lr'], momentum=args['momentum'])
    # train
    for epoch in range(10):
        train(args, model, device, train_loader, optimizer, epoch)
        test_acc = test(args, model, device, test_loader)
        print(test_acc)
    print('final accuracy:', test_acc)

if __name__ == '__main__':
    params = {
        'batch_size': 32,
        'hidden_size': 128,
        'lr': 0.001,
        'momentum': 0.5
    }
    main(params)
The above code can only try one set of parameters at a time. If you want to tune the learning rate, you need to manually modify the hyperparameter and start the trial again and again.
NNI is born to help users tune jobs, whose working process is presented below:
input: search space, trial code, config file
output: one optimal hyperparameter configuration

1: For t = 0, 1, 2, ..., maxTrialNum,
2:      hyperparameter = chose a set of parameter from search space
3:      final result = run_trial_and_evaluate(hyperparameter)
4:      report final result to NNI
5:      If reach the upper limit time,
6:          Stop the experiment
7: return hyperparameter value with best final result
Note
If you want to use NNI to automatically train your model and find the optimal hyper-parameters, there are two approaches:
Write a config file and start the experiment from the command line.
Config and launch the experiment directly from a Python file
In the this part, we will focus on the first approach. For the second approach, please refer to this tutorial.
Step 1: Modify the Trial Code
Modify your Trial file to get the hyperparameter set from NNI and report the final results to NNI.
+ import nni

  def main(args):
      # load data
      train_loader = torch.utils.data.DataLoader(datasets.MNIST(...), batch_size=args['batch_size'], shuffle=True)
      test_loader = torch.tuils.data.DataLoader(datasets.MNIST(...), batch_size=1000, shuffle=True)
      # build model
      model = Net(hidden_size=args['hidden_size'])
      optimizer = optim.SGD(model.parameters(), lr=args['lr'], momentum=args['momentum'])
      # train
      for epoch in range(10):
          train(args, model, device, train_loader, optimizer, epoch)
          test_acc = test(args, model, device, test_loader)
-         print(test_acc)
+         nni.report_intermediate_result(test_acc)
-     print('final accuracy:', test_acc)
+     nni.report_final_result(test_acc)

  if __name__ == '__main__':
-     params = {'batch_size': 32, 'hidden_size': 128, 'lr': 0.001, 'momentum': 0.5}
+     params = nni.get_next_parameter()
      main(params)
Example: mnist.py
Step 2: Define the Search Space
Define a Search Space in a YAML file, including the name and the distribution (discrete-valued or continuous-valued) of all the hyperparameters you want to search.
searchSpace:
   batch_size:
      _type: choice
      _value: [16, 32, 64, 128]
   hidden_size:
      _type: choice
      _value: [128, 256, 512, 1024]
   lr:
      _type: choice
      _value: [0.0001, 0.001, 0.01, 0.1]
   momentum:
      _type: uniform
      _value: [0, 1]
Example: config_detailed.yml
You can also write your search space in a JSON file and specify the file path in the configuration. For detailed tutorial on how to write the search space, please see here.
Step 3: Config the Experiment
In addition to the search_space defined in the step2, you need to config the experiment in the YAML file. It specifies the key information of the experiment, such as the trial files, tuning algorithm, max trial number, and max duration, etc.
experimentName: MNIST               # An optional name to distinguish the experiments
trialCommand: python3 mnist.py      # NOTE: change "python3" to "python" if you are using Windows
trialConcurrency: 2                 # Run 2 trials concurrently
maxTrialNumber: 10                  # Generate at most 10 trials
maxExperimentDuration: 1h           # Stop generating trials after 1 hour
tuner:                              # Configure the tuning algorithm
   name: TPE
   classArgs:                       # Algorithm specific arguments
      optimize_mode: maximize
trainingService:                    # Configure the training platform
   platform: local
Experiment config reference could be found here.
Note
If you are planning to use remote machines or clusters as your training service, to avoid too much pressure on network, NNI limits the number of files to 2000 and total size to 300MB. If your codeDir contains too many files, you can choose which files and subfolders should be excluded by adding a .nniignore file that works like a .gitignore file. For more details on how to write this file, see the git documentation.
Example: config_detailed.yml and .nniignore
All the code above is already prepared and stored in examples/trials/mnist-pytorch/.
Step 4: Launch the Experiment
Linux and macOS
Run the config_detailed.yml file from your command line to start the experiment.
nnictl create --config nni/examples/trials/mnist-pytorch/config_detailed.yml
Windows
Change python3 to python of the trialCommand field in the config_detailed.yml file, and run the config_detailed.yml file from your command line to start the experiment.
nnictl create --config nni\examples\trials\mnist-pytorch\config_detailed.yml
Note
nnictl is a command line tool that can be used to control experiments, such as start/stop/resume an experiment, start/stop NNIBoard, etc. Click here for more usage of nnictl.
Wait for the message INFO: Successfully started experiment! in the command line. This message indicates that your experiment has been successfully started. And this is what we expect to get:
INFO: Starting restful server...
INFO: Successfully started Restful server!
INFO: Setting local config...
INFO: Successfully set local config!
INFO: Starting experiment...
INFO: Successfully started experiment!
-----------------------------------------------------------------------
The experiment id is egchD4qy
The Web UI urls are: [Your IP]:8080
-----------------------------------------------------------------------

You can use these commands to get more information about the experiment
-----------------------------------------------------------------------
         commands                       description
1. nnictl experiment show        show the information of experiments
2. nnictl trial ls               list all of trial jobs
3. nnictl top                    monitor the status of running experiments
4. nnictl log stderr             show stderr log content
5. nnictl log stdout             show stdout log content
6. nnictl stop                   stop an experiment
7. nnictl trial kill             kill a trial job by id
8. nnictl --help                 get help information about nnictl
-----------------------------------------------------------------------
If you prepared trial, search space, and config according to the above steps and successfully created an NNI job, NNI will automatically tune the optimal hyper-parameters and run different hyper-parameter sets for each trial according to the defined search space. You can see its progress through the WebUI clearly.
Step 5: View the Experiment
After starting the experiment successfully, you can find a message in the command-line interface that tells you the Web UI url like this:
The Web UI urls are: [Your IP]:8080
Open the Web UI url (Here it’s: [Your IP]:8080) in your browser, you can view detailed information about the experiment and all the submitted trial jobs as shown below. If you cannot open the WebUI link in your terminal, please refer to the FAQ.
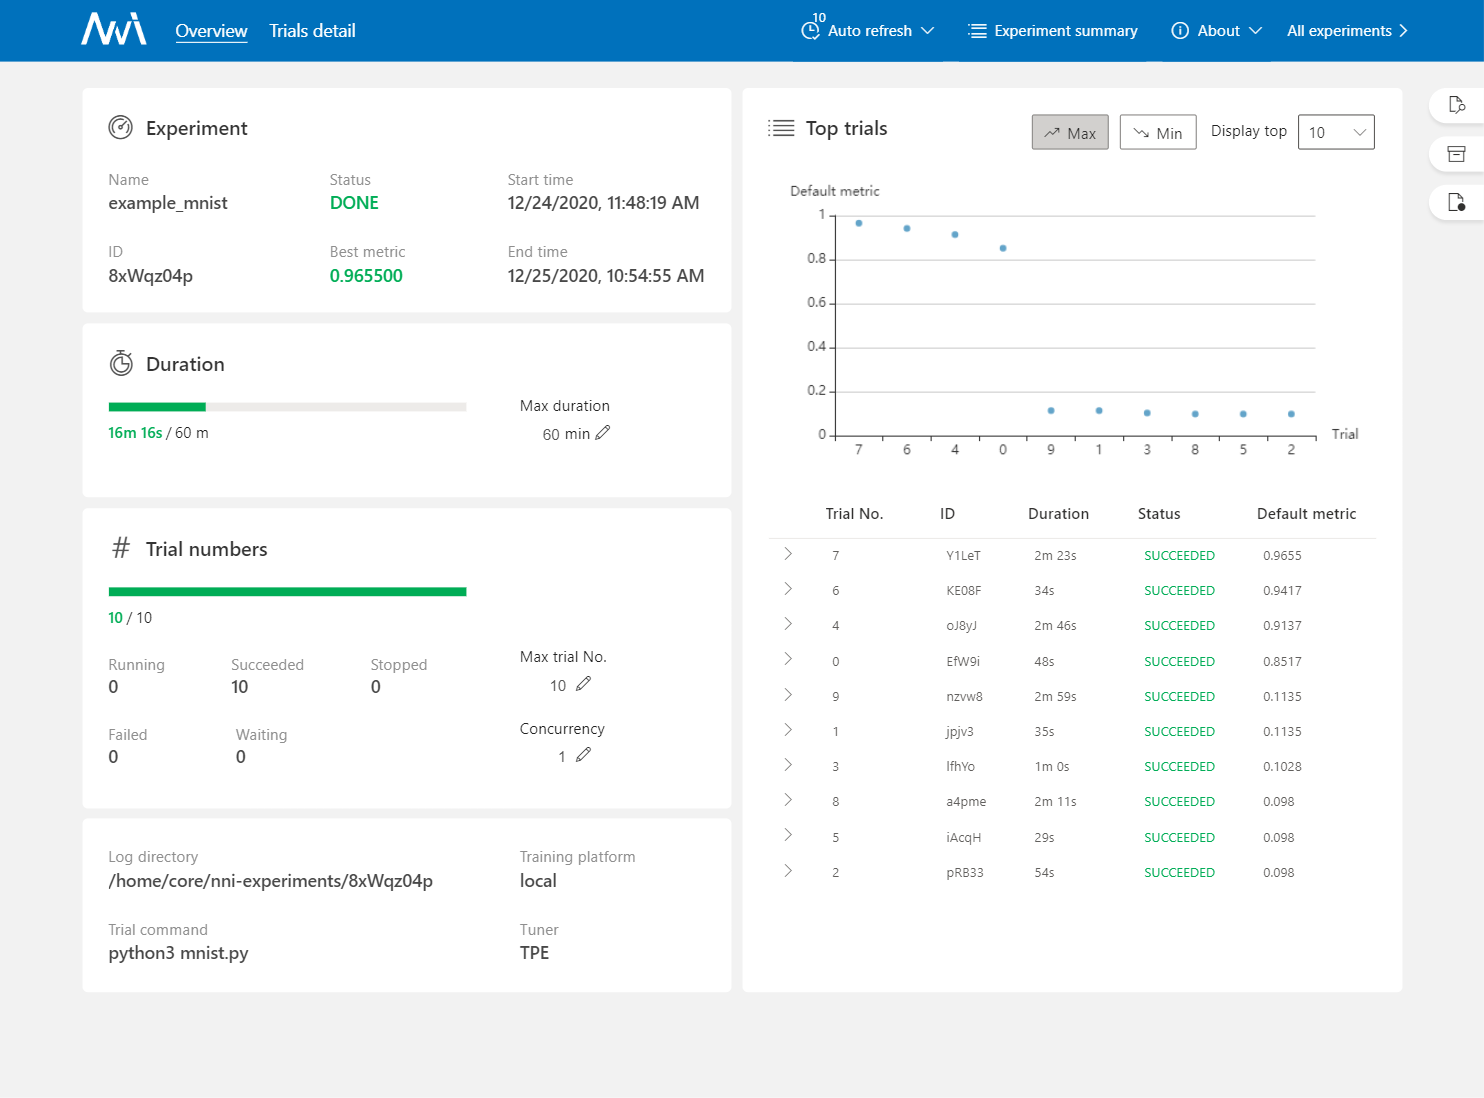
View Overview Page
Information about this experiment will be shown in the WebUI, including the experiment profile and search space message. NNI also supports downloading this information and the parameters through the Experiment summary button.

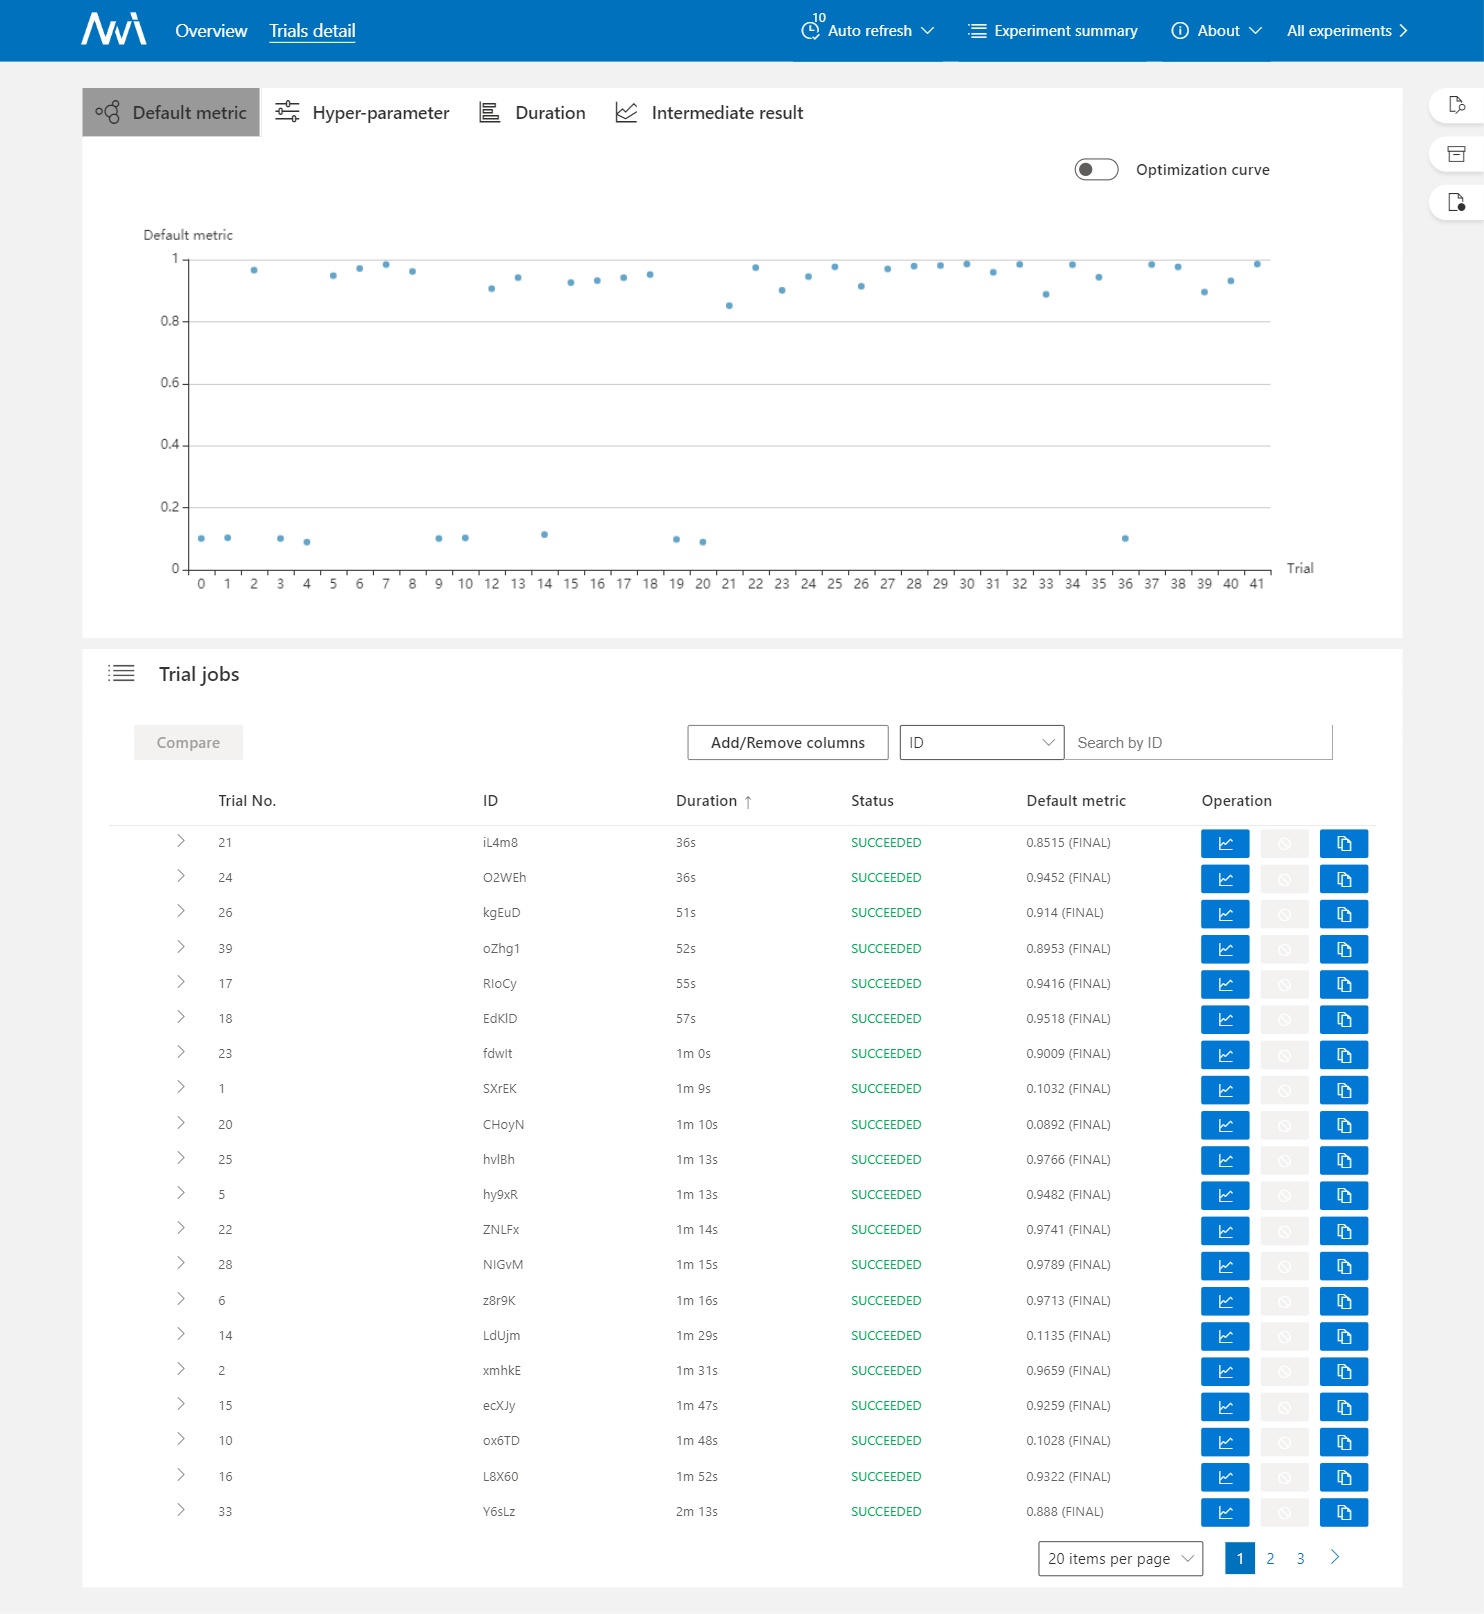
View Trials Detail Page
You could see the best trial metrics and hyper-parameter graph in this page. And the table content includes more columns when you click the button Add/Remove columns.

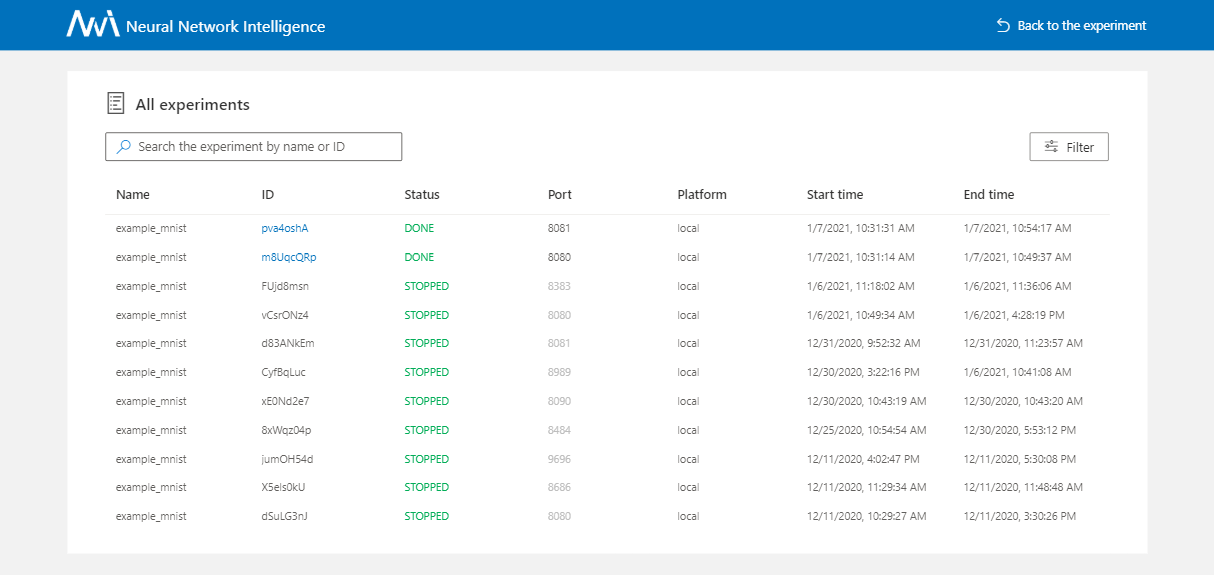
View Experiments Management Page
On the All experiments page, you can see all the experiments on your machine.

For more detailed usage of WebUI, please refer to this doc.